Beginning your Journey into Web Dev
Commands differ between MacOS and Windows users. Be sure to use the correct commands. If you encounter errors, please refer to the QnA page.
Windows
Step 1: Installing a Package Manager
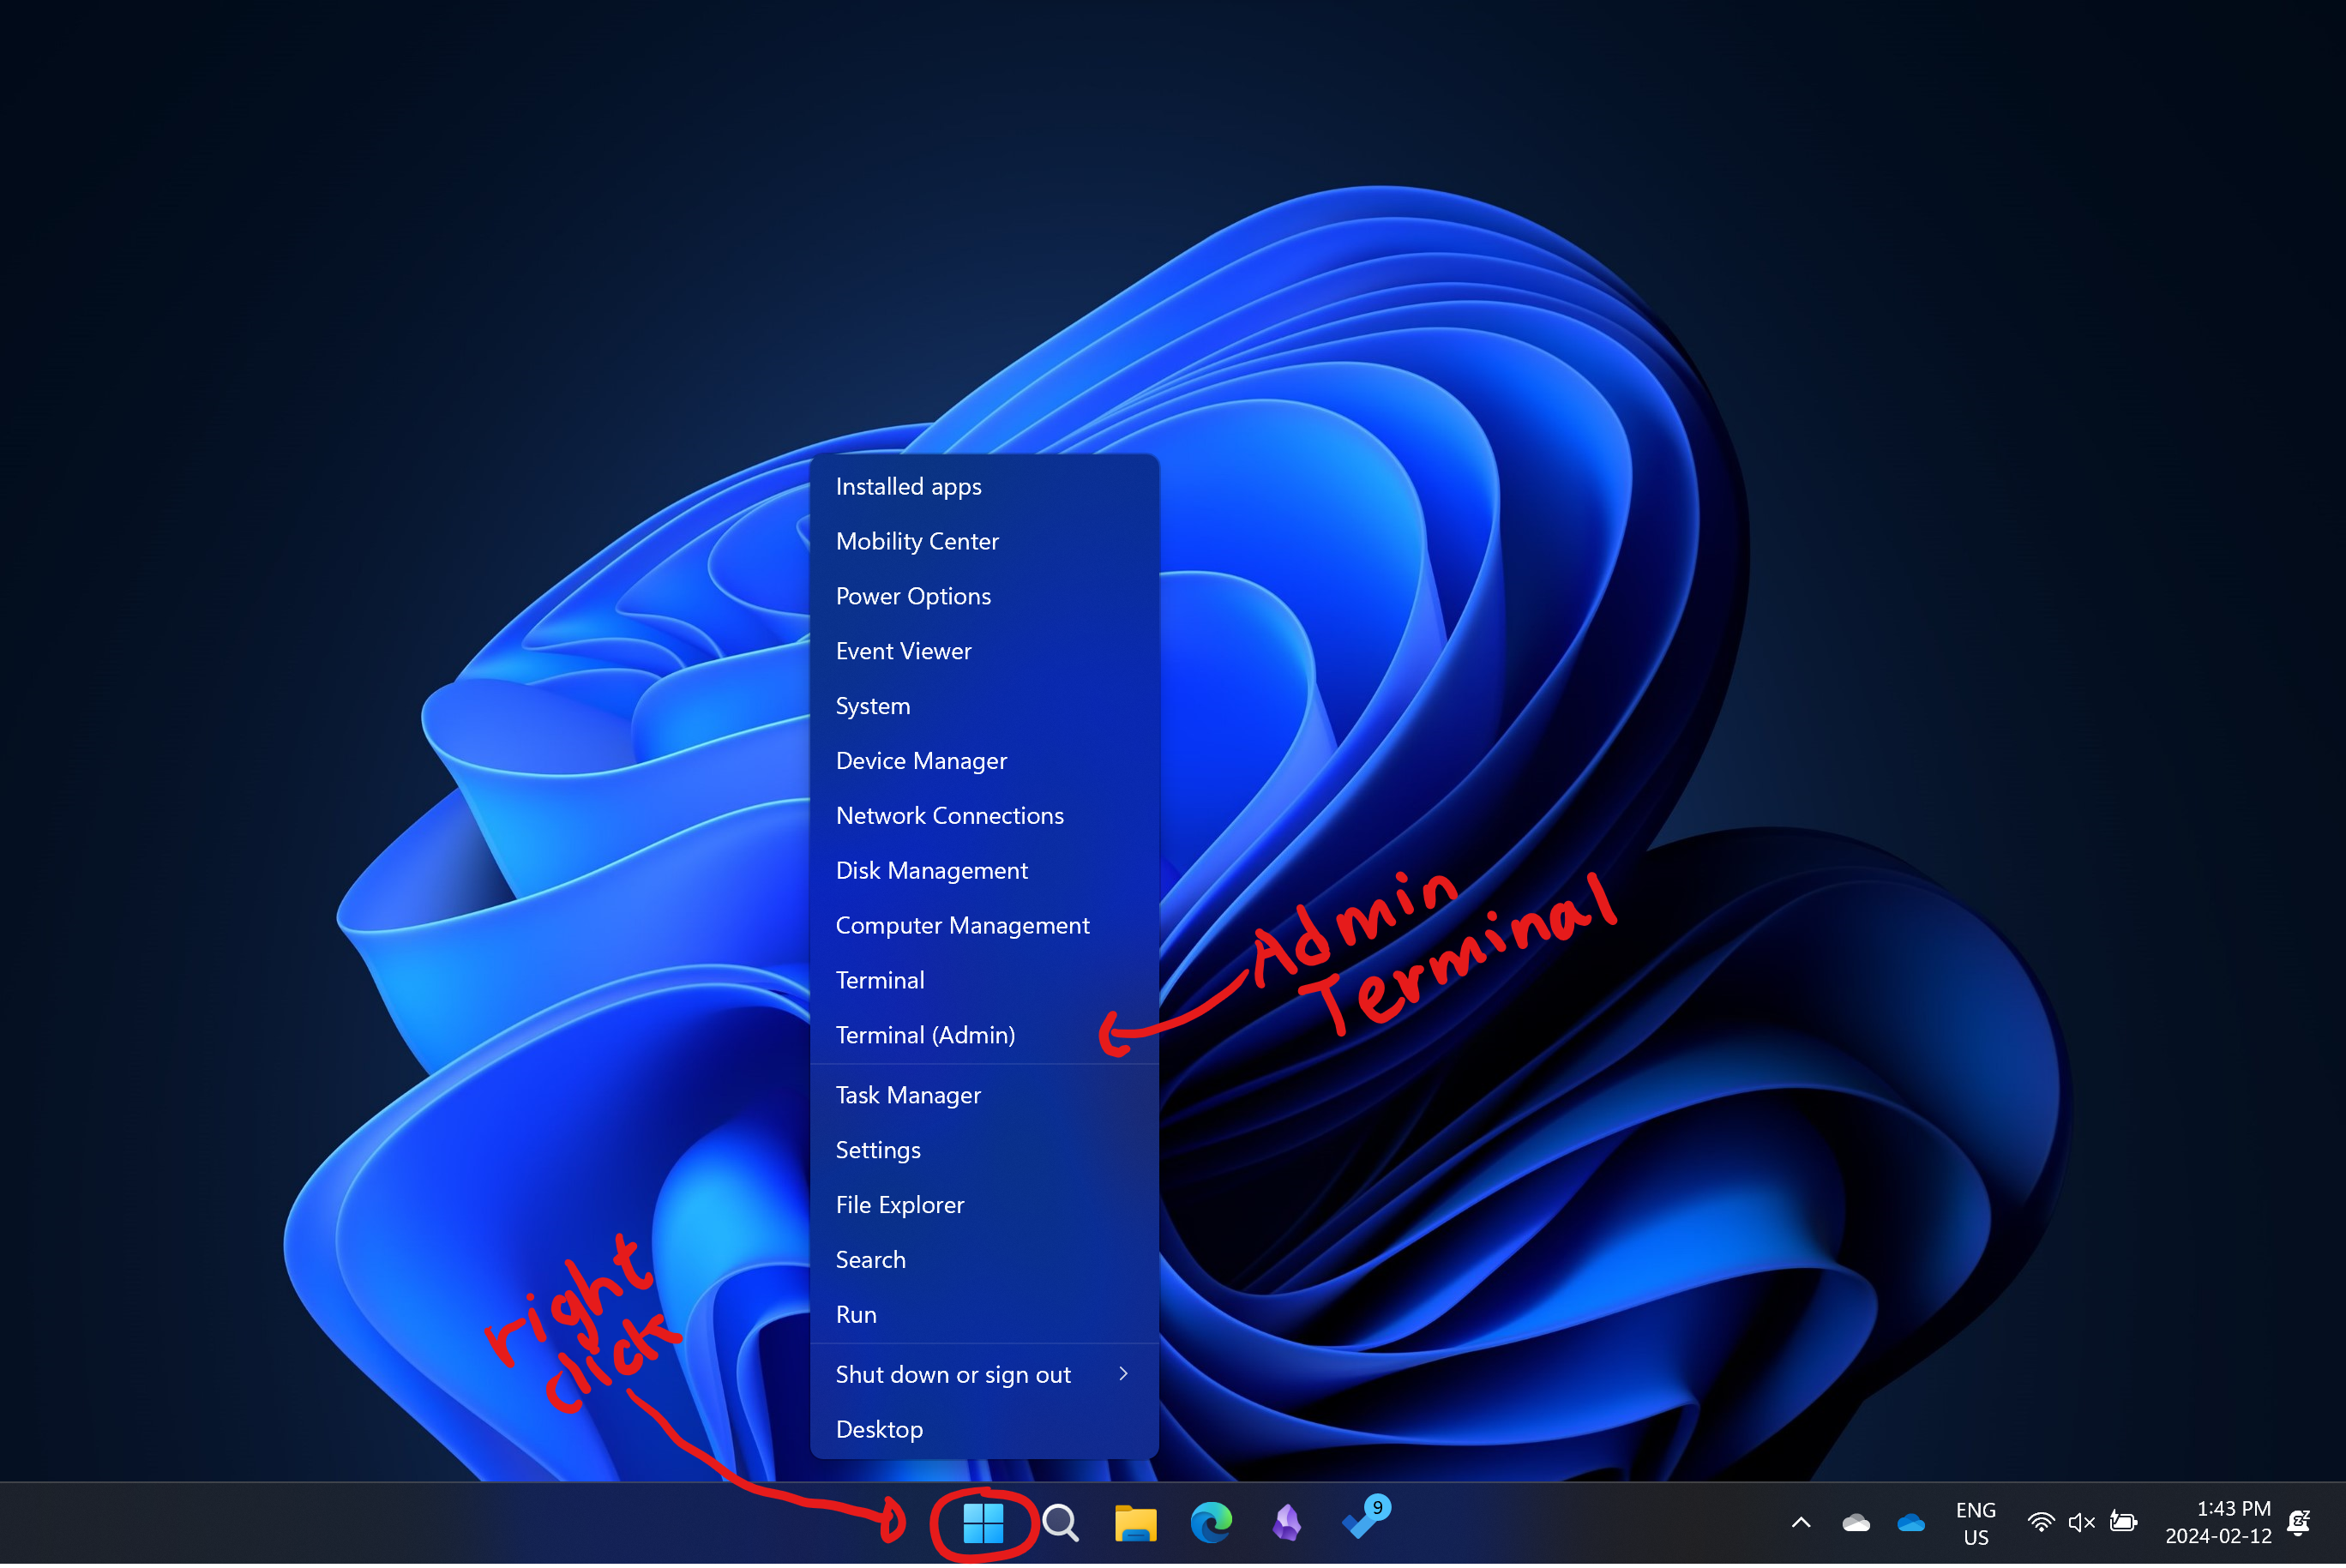
- Open an administrative shell:

- Install the package manager Chocolatey
Set-ExecutionPolicy Bypass -Scope Process -Force; [System.Net.ServicePointManager]::SecurityProtocol = [System.Net.ServicePointManager]::SecurityProtocol -bor 3072; iex ((New-Object System.Net.WebClient).DownloadString('https://community.chocolatey.org/install.ps1'));
Set-ExecutionPolicy RemoteSigned- Ensure the package manager is installed by running the following command
chocoCongratulations! You’ve now successfully installed a package manager.
Step 2: Installing the Required Packages
- Install Git and Visual Studio Code
Note: if you already have either git or vscode installed, remove the respective package from the command below. You can check if you have git installed by running git in the terminal
choco install git vscode- Install
nvm
Note: for this one in particular, it’s important that an existing version of nvm isn’t already installed. Verify that the command nvm is not recognized.
choco install nvm- Install node.js and npm
nvm install ltsThen activate the node version
nvm use <the version you just installed>Step: 3 Starting a Nextjs project
Make a new folder with the name of your app and select it in VSCode
Open visual studio code’s terminal
Use the shortcut
ctrl+`Run the create-next-app command
npx create-next-app@latest .Options:
- Use Typescript? No
- Use ESLint? No
- Use Tailwind? No
- Use
/srcDirectory? Yes - Use App Router? Yes
- Customize Default Import Alias? No
MacOS
Step 1: Installing a Package Manager
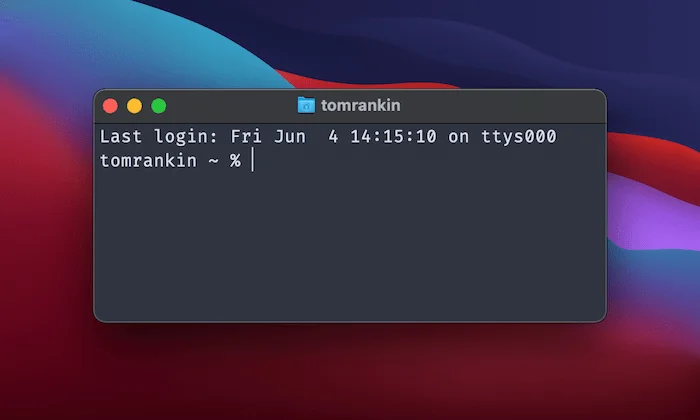
- Open the terminal (either through launch pad or just through app search):

- Install the package manager Brew
/bin/bash -c "$(curl -fsSL https://raw.githubusercontent.com/Homebrew/install/HEAD/install.sh)"- Verify that brew installed by running the following command (you may have to restart first)
brew --versionyou should see the version of brew you have installed.
Congratulations! You’ve now successfully installed a package manager.
Step 2: Installing the Required Packages
- Install Git NVM and VSCode
brew install git nvm
brew install --cask visual-studio-code- Add nvm to your command list
source $(brew --prefix nvm)/nvm.sh
echo "source $(brew --prefix nvm)/nvm.sh" >> ~/.profile- Install node.js and npm
nvm install ltsThen activate the node version
nvm use <the version you just installed>Depending on installation, your device may require a restart now.
Step: 3 Starting a Nextjs project
Make a new folder with the name of your app and select it in VSCode
Open visual studio code’s terminal
Use the shortcut
ctrl+`Run the create-next-app command
npx create-next-app@latest .Options:
- Use Typescript? No
- Use ESLint? No
- Use Tailwind? No
- Use
/srcDirectory? Yes - Use App Router? Yes
- Customize Default Import Alias? No
HAVE FUN
If you ever want to see the finalized code from the workshop, check it out at the github url.
🎉 Thanks you for attending! 🎉